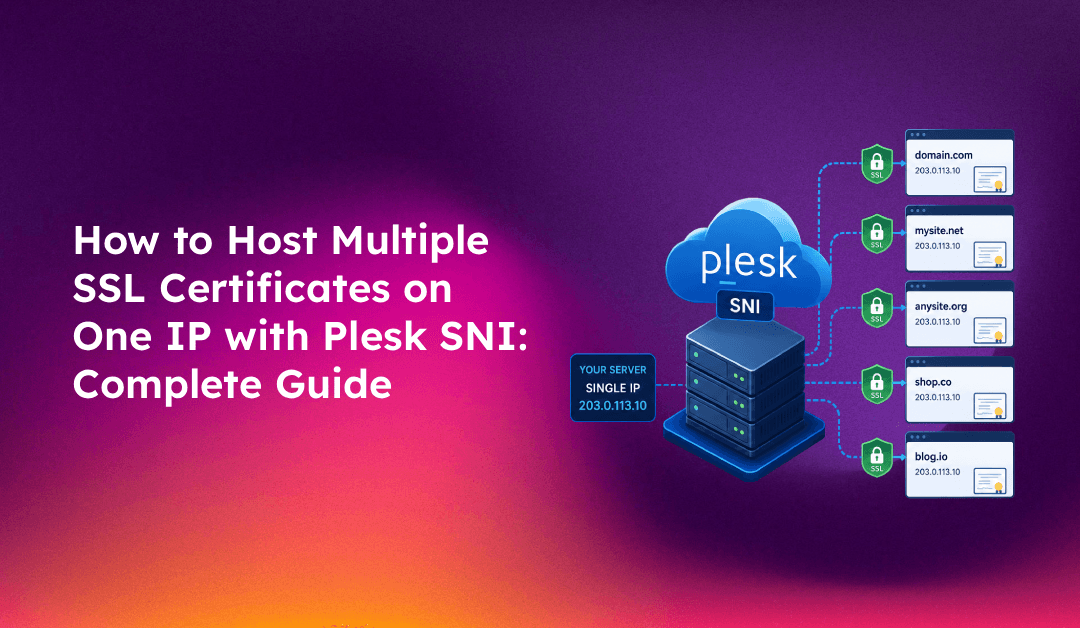
IPv4 address scarcity is a real operational constraint for web hosting providers. Traditionally, each domain serving HTTPS required its own dedicated IP address to host a separate SSL certificate — a model that quickly exhausts IP pools on shared hosting servers. Server Name Indication (SNI) solves this problem by allowing multiple domains, each with their own SSL certificate, to share a single IP address.
If you manage a Plesk server and need to host SSL certificates for multiple domains on one IP, this guide covers everything: how SNI works in Plesk, the step-by-step assignment process, common SNI errors and how to fix them, and how SNI compares to wildcard and multi-domain (SAN) certificates.
What Is SNI and Why It Solves the Multiple SSL Problem
SNI is an extension to the TLS protocol that allows a client (browser) to specify which hostname it is trying to connect to at the start of the TLS handshake — before the server has sent any certificate. This lets the web server select the correct SSL certificate for that domain and present it to the client, even when hundreds of domains share the same IP address.
Without SNI, the server has no way of knowing which domain the client wants during the TLS handshake (because the HTTP Host header is only available after TLS is established). The server can only present one certificate per IP, which is why each domain traditionally required its own IP.
SNI is supported by all modern browsers and operating systems. The only notable exceptions are Internet Explorer on Windows XP and very old Android versions (pre-2.3), both of which have negligible market share today. For virtually all hosting environments, SNI works without client-side compatibility concerns.
Plesk SNI Support: Requirements and How It Works
Plesk supports SNI on both Linux and Windows servers, but with differences:
- Linux (Apache + nginx) — SNI is fully supported. Plesk uses nginx as the SSL termination layer by default on Linux servers, and nginx has supported SNI since version 0.5.23 (released 2007). No special configuration is needed to enable SNI — it works automatically when you assign SSL certificates to domains on a shared IP.
- Windows (IIS) — SNI is supported in IIS 8.0 and later (Windows Server 2012+). If your Plesk server is running IIS 7.x, SNI is not available and each domain with SSL requires a dedicated IP.
In Plesk's IP address model, IPs can be designated as either dedicated (one domain per IP) or shared (multiple domains per IP). SNI certificates work on shared IPs. When you assign an SSL certificate to a domain hosted on a shared IP, Plesk and nginx automatically use SNI to serve the correct certificate to each connecting client.
💡 None of these worked? Skip the guesswork.
Get Expert Help →Step-by-Step: Assigning Independent SSL Certificates to Multiple Domains on One IP
The following process works for Plesk Obsidian on Linux. The same steps apply for Plesk Onyx with minor UI differences.
In Plesk admin, go to Tools & Settings → IP Addresses. Locate the IP you want to use. It should show Shared in the Type column. If it shows Dedicated, click the IP and change the type to Shared — note that a dedicated IP with an existing domain hosting setup cannot be converted while domains are using it.
The easiest way to assign an SSL certificate in Plesk is through the Let's Encrypt extension:
- Go to Domains → [domain name] → SSL/TLS Certificates
- Click Install a free basic certificate provided by Let's Encrypt
- Select the checkbox for the domain and www variant
- Click Get it free
Repeat this for each domain on the shared IP. Each domain gets its own certificate issued independently. Let's Encrypt certificates auto-renew every 90 days.
If using a commercial CA certificate instead of Let's Encrypt:
- Go to Domains → [domain name] → SSL/TLS Certificates → Add SSL/TLS Certificate
- Enter a certificate name (for your reference), then generate a Certificate Signing Request (CSR) by filling in the domain details
- Submit the CSR to your CA, receive the signed certificate and intermediate CA bundle
- Return to SSL/TLS Certificates, click the certificate name you created, and upload the certificate file and CA bundle
- Click Upload Certificate, then return to the domain's SSL/TLS Certificates page and click Select next to the uploaded certificate to make it active
After installing the certificate, go to Domains → [domain name] → Hosting Settings and ensure SSL/TLS support is checked. Also check Permanent SEO-safe 301 redirect from HTTP to HTTPS to enforce HTTPS for all visitors.
Use openssl from SSH to verify the correct certificate is served for each domain:
openssl s_client -connect SHARED_IP:443 -servername domain1.com 2>/dev/null | openssl x509 -noout -subject -dates
openssl s_client -connect SHARED_IP:443 -servername domain2.com 2>/dev/null | openssl x509 -noout -subject -datesEach command should return the certificate for the specified domain, even though both connect to the same IP. If both commands return the same certificate, SNI is not working correctly — see the troubleshooting section below.
Common SNI Errors in Plesk and How to Fix Them
Wrong Certificate Served (All Domains Get the Same Certificate)
This usually means nginx is not correctly mapping SNI hostnames to the right virtual host configuration. In Plesk on Linux, nginx configuration files are generated automatically. Force a regeneration:
plesk repair web -allThis command regenerates nginx and Apache configuration for all domains. After completion, test again with openssl s_client -servername.
SSL Certificate Mismatch Warning in Browsers
A certificate mismatch warning ("Your connection is not private" with NET::ERR_CERT_COMMON_NAME_INVALID) when visiting a domain on a shared IP can mean:
- The domain does not have an SSL certificate assigned in Plesk — it is being served the default certificate from another domain on the IP
- The wrong certificate is assigned to the domain (for example, a wildcard for *.domain1.com is assigned to domain2.com)
- The SSL certificate has expired
Resolve this by going to Domains → [affected domain] → SSL/TLS Certificates and confirming a valid certificate is assigned and active for that domain.
"SSL SNI does not work for my domains" After Plesk Update
Plesk updates occasionally regenerate nginx configurations and can overwrite custom SNI settings. If SNI stops working after a Plesk update, run plesk repair web -all and check nginx error logs:
tail -50 /var/log/nginx/error.logLook for no certificate found or SSL_CTX_use_certificate_file failed errors that indicate a certificate file path issue in the generated nginx configuration.
Let's Encrypt Certificate Fails to Issue on a Shared IP
Let's Encrypt domain validation requires that the domain resolves to a reachable server. On a shared IP, ensure:
- The domain's DNS A record points to the correct shared IP
- Port 80 is open and not blocked by the server firewall (required for HTTP-01 ACME challenge)
- No other domain's redirect rule is intercepting the
/.well-known/acme-challenge/path
SNI vs Wildcard vs Multi-Domain (SAN) Certificates: Choosing the Right Approach
SNI alone determines how certificates are served from a single IP — it does not dictate what type of certificate you use. Here is how the certificate types compare in a Plesk shared hosting context:
- Individual domain certificates with SNI — one certificate per domain, independently issued and renewed. Best for shared hosting where each customer owns their own domain and manages their own certificate. Let's Encrypt makes this free and auto-renewing.
- Wildcard certificates — one certificate covers all subdomains of a domain (*.example.com). Best for your own server's subdomains (mail.yourserver.com, admin.yourserver.com, etc.) or for clients who want SSL across all their subdomains with a single certificate. Cannot cover different root domains.
- Multi-domain (SAN) certificates — one certificate covers multiple explicitly listed domains (up to 100 SANs per certificate). Useful for organisations with multiple owned domains that want to manage a single certificate. Requires re-issuance whenever a domain is added or removed from the list.
For most Plesk shared hosting scenarios, the combination of a shared IP with SNI-based individual Let's Encrypt certificates per domain is the most operationally efficient approach: zero cost, automatic renewal, and no IP address overhead.
Checking and Managing SNI Certificates at Scale in Plesk
If you manage a Plesk server with dozens or hundreds of domains, tracking SSL certificate expiry across all SNI-hosted domains becomes important. Plesk provides a built-in SSL certificate overview in Tools & Settings → SSL/TLS Certificates (admin view) that shows all certificates across all subscriptions, their expiry dates, and whether auto-renewal is enabled.
For bulk Let's Encrypt certificate installation across all domains on a server, use the Plesk CLI:
# List all domains without Let's Encrypt certificates
plesk bin extension --exec letsencrypt cli.php -list
# Install Let's Encrypt for a specific domain
plesk bin extension --exec letsencrypt cli.php -d yourdomain.comMaintaining SSL certificates across large Plesk deployments with mixed certificate types, custom CAs, and expiry monitoring is a significant operational overhead. CloudHouse Technologies' managed Plesk service handles certificate provisioning, SNI configuration validation, renewal monitoring, and emergency certificate replacement across all your managed Plesk servers.