If your hosting clients keep getting the error "Mail can't verify the identity of mail.example.com" in Outlook, Apple Mail, or Thunderbird, the problem is almost always a missing or misconfigured SSL/TLS certificate on the Plesk mail server. This is one of the most common support tickets in shared hosting — and one of the most preventable.
This guide explains how Plesk mail server SSL works, how to assign the right certificate to secure SMTP, IMAP, and POP3 connections, how to verify the configuration with OpenSSL, and how to fix the most common mail certificate errors that hosting clients report.
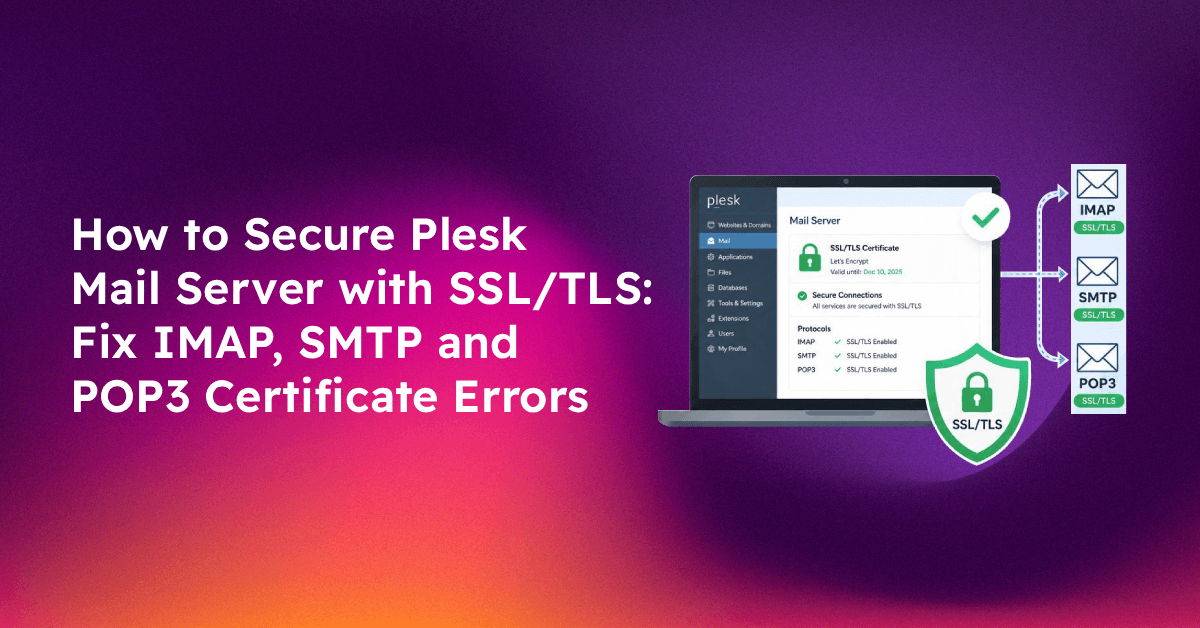
How Plesk Mail Server SSL Works
Plesk runs a mail server (Postfix for SMTP and Dovecot for IMAP/POP3) alongside its web server. These are separate services, each requiring their own SSL certificate assignment. Many admins configure SSL for websites but forget the mail server — resulting in a valid HTTPS website but an untrusted mail server certificate.
The mail server uses a single hostname for all domains hosted on the server. This is the key difference from website SSL: each domain gets its own certificate for HTTPS, but all email accounts on the server share one mail server hostname (e.g. mail.yourserver.com or the server's own hostname). The SSL certificate must be valid for that shared hostname.
Email ports in Plesk:
- IMAP SSL/TLS: port 993
- POP3 SSL/TLS: port 995
- SMTP SSL/TLS: port 465
- SMTP STARTTLS: port 587
Step 1: Identify Your Mail Server Hostname
Before assigning a certificate, confirm what hostname Plesk uses for its mail server:
# SSH as root
hostname -fOr check in Plesk: Tools & Settings → Server Settings → Full Hostname.
This hostname is what email clients must use as the incoming and outgoing mail server. For example, if your server hostname is srv1.cloudhosting.net, clients should configure IMAP server as srv1.cloudhosting.net and the SSL certificate must be valid for srv1.cloudhosting.net.
Alternatively, many hosting companies use a dedicated mail hostname like mail.yourdomain.com pointing to the server IP — in which case the SSL certificate must be valid for mail.yourdomain.com.
Step 2: Obtain an SSL Certificate for the Mail Server Hostname
Option A: Free Let's Encrypt Certificate (Recommended)
In Plesk, go to Tools & Settings → SSL/TLS Certificates. Click Add SSL/TLS Certificate, then choose Get it free (Let's Encrypt).
Enter the mail server hostname (e.g. srv1.cloudhosting.net) in the domain field. Ensure this hostname resolves to the server's public IP (verify with dig +short srv1.cloudhosting.net). Let's Encrypt will issue a certificate valid for this hostname within minutes.
Important: The domain must point to this server for Let's Encrypt HTTP-01 validation to work. If the hostname is the server's own FQDN (not hosted as a website in Plesk), use DNS-01 validation or a paid certificate instead.
Option B: Commercial SSL Certificate
Generate a CSR in Plesk: Tools & Settings → SSL/TLS Certificates → Add Certificate → fill in details and click Generate CSR & Private Key. Submit the CSR to your certificate authority. When you receive the certificate, go back to SSL/TLS Certificates, find the pending certificate, and paste the certificate and CA chain into the appropriate fields. Click Upload Certificate.
Always include the CA chain/intermediate certificate — missing the CA chain causes "unable to verify the first certificate" errors in email clients even when the certificate itself is valid.
💡 None of these worked? Skip the guesswork.
Get Expert Help →Step 3: Assign the Certificate to the Plesk Mail Server
Having a certificate in Plesk's certificate store is not enough — you must explicitly assign it to the mail server:
1. Go to Tools & Settings → SSL/TLS Certificates
2. Find the certificate valid for your mail hostname and click its name
3. Scroll down to the "Assign this certificate" section
4. Check "Mail" to assign the certificate to Postfix (SMTP) and Dovecot (IMAP/POP3)
5. Click OK — Plesk will automatically restart the mail services with the new certificate
Alternatively, navigate to Tools & Settings → Mail Server Settings and find the SSL/TLS Certificate dropdown — select the correct certificate there.
Step 4: Verify the SSL Certificate is Active
After assigning, verify each mail protocol is presenting the correct certificate using OpenSSL from an external machine:
# Test IMAP SSL (port 993)
openssl s_client -connect mail.yourserver.com:993 -showcerts 2>/dev/null | openssl x509 -noout -subject -dates
# Test POP3 SSL (port 995)
openssl s_client -connect mail.yourserver.com:995 -showcerts 2>/dev/null | openssl x509 -noout -subject -dates
# Test SMTP with STARTTLS (port 587)
openssl s_client -starttls smtp -connect mail.yourserver.com:587 -showcerts 2>/dev/null | openssl x509 -noout -subject -dates
# Test SMTP SSL (port 465)
openssl s_client -connect mail.yourserver.com:465 -showcerts 2>/dev/null | openssl x509 -noout -subject -datesThe output should show the subject matching your mail server hostname and notAfter showing a future expiry date. If it shows a self-signed certificate or the wrong hostname, the certificate was not assigned correctly.
Step 5: Update Email Client Settings
After configuring the server certificate, clients must use the mail server hostname (not their domain name) in their email client settings:
- Incoming Mail Server (IMAP):
mail.yourserver.com— Port 993 — SSL/TLS - Outgoing Mail Server (SMTP):
mail.yourserver.com— Port 465 (SSL) or 587 (STARTTLS) - Username: full email address (e.g.
user@domain.com)
The most common reason clients still get certificate warnings after the server is correctly configured is that they've entered their domain name (e.g. domain.com) as the mail server instead of the actual server hostname. The SSL certificate is valid for the server hostname, not each individual domain name.
Troubleshooting Common Plesk Mail SSL Errors
Error: "Mail can't verify the identity of mail.example.com"
This means the certificate presented by the mail server doesn't match the hostname the client is connecting to. Fix checklist:
- Verify the certificate is assigned to "Mail" in Tools & Settings → SSL/TLS Certificates
- Confirm the client is using the correct mail server hostname (the one matching the certificate's CN or SAN)
- Check the certificate hasn't expired:
openssl s_client -connect mail.yourserver.com:993 | openssl x509 -noout -dates
Error: "Certificate chain incomplete" or "Unable to verify first certificate"
The CA intermediate certificate is missing. In Plesk, go to the certificate entry and ensure the CA Certificate field contains the full chain. Your certificate authority's website will have a "certificate bundle" or "CA chain" file to download and paste here.
Error: Let's Encrypt fails to renew mail server certificate
If the mail server hostname is not hosted as a website in Plesk, Let's Encrypt cannot use HTTP-01 validation. Solutions:
- Add the hostname as a domain in Plesk (even without an active website) so the challenge file can be served
- Use DNS-01 validation by installing the Plesk Let's Encrypt extension with DNS API support
- Switch to a paid SSL certificate with manual renewal
Error: SMTP port 465 refuses connection
Check if port 465 is enabled in Plesk: Tools & Settings → Mail Server Settings → Enable SMTPS (SSL, port 465). Also verify the firewall (CSF or iptables) allows inbound connections on port 465:
iptables -L INPUT -n | grep 465
# Or with CSF:
grep 465 /etc/csf/csf.confError: Mail server shows self-signed certificate after Plesk upgrade
Plesk upgrades occasionally reset the mail server certificate assignment to the default self-signed certificate. After any major Plesk upgrade, re-verify the certificate assignment in Tools & Settings → SSL/TLS Certificates and re-assign your certificate to "Mail" if needed.
Auto-Renewal Setup for Mail Server Certificates
Let's Encrypt certificates expire every 90 days. If your mail server certificate is a Let's Encrypt cert managed through Plesk, auto-renewal is handled automatically by the Let's Encrypt extension. Verify auto-renewal is enabled:
Go to Plesk Domains → [domain used for mail cert] → SSL/TLS Certificates → find the Let's Encrypt certificate and confirm "Automatically renew this certificate before it expires" is checked.
Plesk sends an email notification to the admin when certificate renewal fails — configure this at Tools & Settings → Notifications → SSL/TLS certificate auto-renewal failed.
If you're managing SSL certificates across multiple Plesk servers and need a systematic approach to certificate management, CloudHouse Technologies provides managed Plesk support including proactive certificate monitoring and renewal management.
Conclusion
Securing the Plesk mail server with SSL/TLS requires three things: a valid certificate for the mail server hostname, explicit assignment of that certificate to the mail services (not just websites), and email clients configured to connect using the server hostname rather than their domain name. Most "certificate error" support tickets trace back to one of these three steps being missed.
Run the OpenSSL verification commands after any certificate change to confirm all four protocols (IMAP, POP3, SMTP SSL, SMTP STARTTLS) are presenting the correct certificate before telling clients everything is fixed.