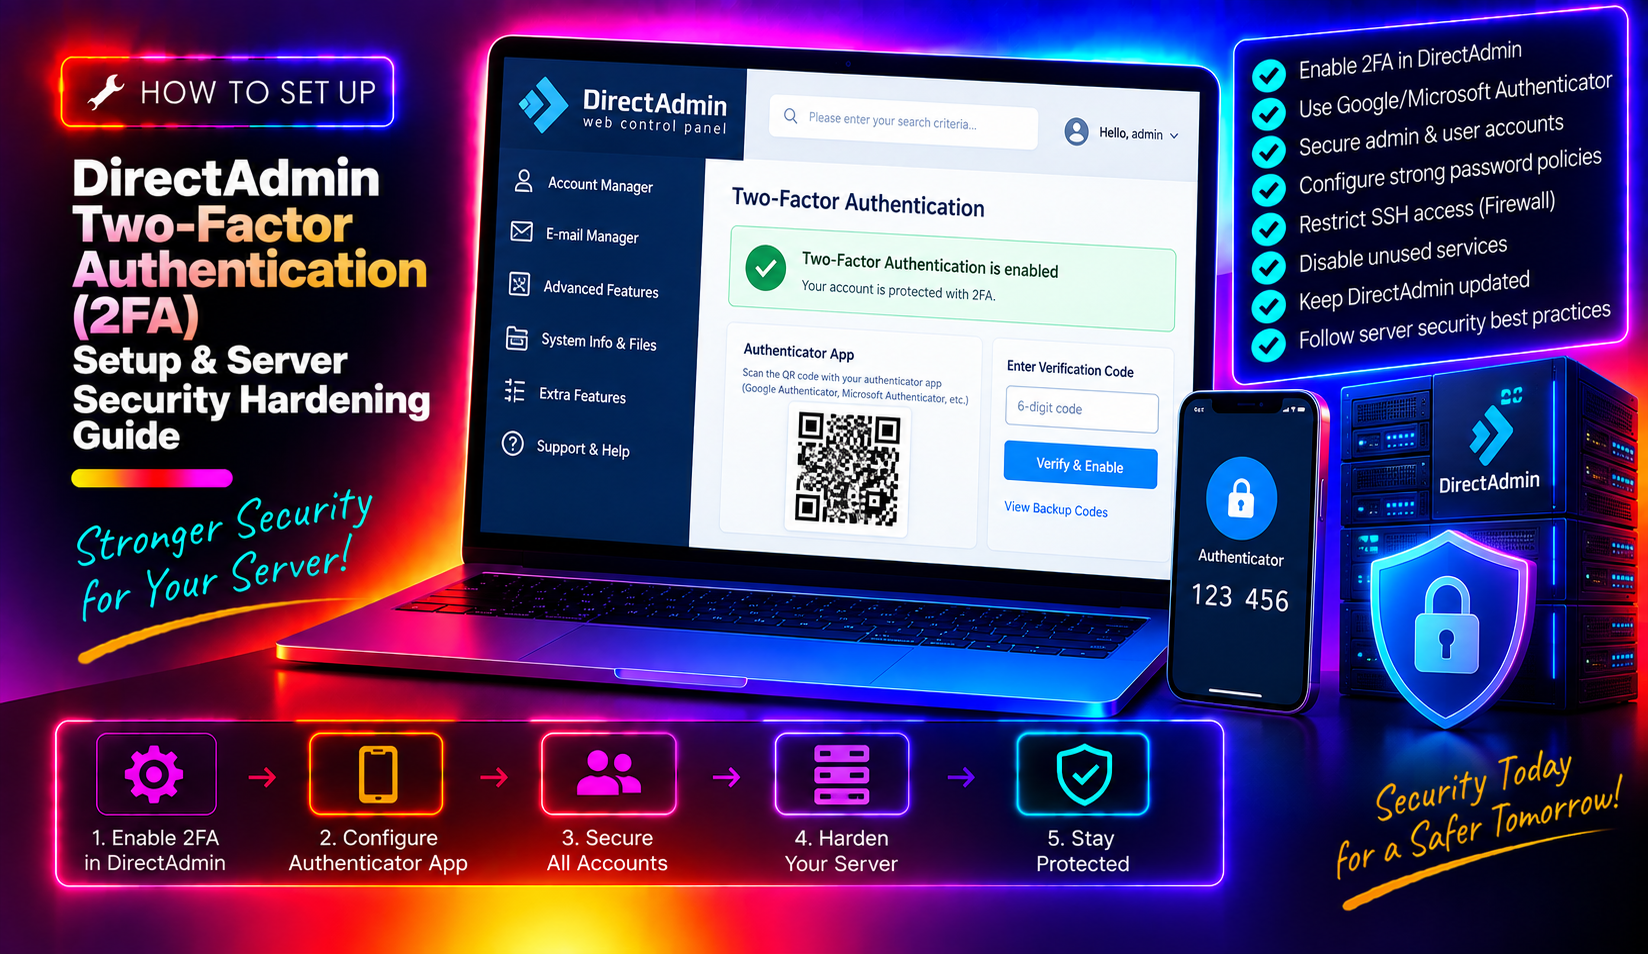
If you manage a DirectAdmin server and haven't enforced two-factor authentication (2FA) across every account tier, your control panel is one stolen password away from a full compromise. This guide covers DirectAdmin two-factor authentication setup from scratch — enabling TOTP for the admin account, enforcing it server-wide via directadmin.conf, integrating the Brute Force Monitor with CSF, and layering ModSecurity and Fail2Ban so that failed 2FA attempts also trigger IP blacklisting. By the end, attackers will face a four-layer defence even if they have valid credentials.
Why DirectAdmin Accounts Are Targeted (and What Attackers Do With Access)
DirectAdmin runs on port 2222 by default — a non-standard port that most internet scanners hit within minutes of a server going live. Credential-stuffing tools recycle leaked username/password pairs from data breaches at thousands of attempts per hour. Once inside, attackers typically:
- Create backdoor reseller or user accounts
- Upload web shells into any hosted domain's public_html
- Hijack the mail server to send spam (destroying your IP reputation within hours)
- Exfiltrate database credentials and customer data
- Install cryptocurrency miners that saturate CPU and trigger hosting abuse reports
The damage compounds fast because DirectAdmin gives access to every domain, database, and email account on the server. A single compromised admin password exposes all of your clients simultaneously. Two-factor authentication breaks this attack chain at the authentication step — even with the correct password, the attacker cannot log in without the rotating TOTP code from the account owner's device.
💡 None of these worked? Skip the guesswork.
Get Expert Help →Enabling 2FA for Your Admin Account: TOTP Setup with Google Authenticator
DirectAdmin uses Time-Based One-Time Passwords (TOTP), compatible with Google Authenticator, Authy, FreeOTP, and any RFC 6238-compliant app. Here is how to enable it for the administrator account.
Navigate to https://your-server-ip:2222, log in as admin, then go to Your Account → Change Your Password → Two-Step Authentication tab.
Click Enable Two-Step Authentication. DirectAdmin generates a shared secret and displays it as both a QR code and a plain-text Base32 string. The secret is stored server-side in /usr/local/directadmin/data/users/admin/two_factor_auth.conf.
Open Google Authenticator → tap the + icon → Scan a QR code. Point the camera at the QR code on screen. The entry labelled with your server's hostname and username will appear immediately. If scanning fails, tap Enter a setup key and type the Base32 string manually.
Enter the current 6-digit code from the app into the Verification Code field on the DirectAdmin page and click Save. DirectAdmin will confirm activation. On your next login you will be prompted for the TOTP code after passing the password check.
DirectAdmin does not generate single-use backup codes the way Google Accounts does. Store the Base32 secret in a password manager (Bitwarden, 1Password). If you lose your phone, you can re-enroll using that secret or reset 2FA via SSH:
rm /usr/local/directadmin/data/users/admin/two_factor_auth.conf
service directadmin restartnano /usr/local/directadmin/conf/directadmin.conf# Require 2FA for all account levels (admin=1, reseller=2, user=4, sum for multiple)
two_factor_auth=7
# Redirect to 2FA setup page on first login instead of blocking outright
two_factor_auth_redirect=1The two_factor_auth bitmask works as follows: 1 = admin, 2 = reseller, 4 = user. Setting 7 (1+2+4) enforces 2FA for all three tiers. When two_factor_auth_redirect=1 is set, a user who logs in without 2FA configured is redirected to the enrolment page rather than being outright denied — this makes rollout smooth without locking out existing accounts instantly.
service directadmin restartLog in as a reseller or user account that does not have 2FA enabled. You should be redirected to the Two-Step Authentication setup page with a notice that enrolment is required before continuing. Once they enrol, normal access is restored.
In the admin panel, go to List All Users. A lock icon in the 2FA column indicates the account has it enabled. Any account without the icon needs to enrol before their next login under the enforced policy.
nano /usr/local/directadmin/conf/brute_force_notice.confIf the file does not exist, BFM settings live inside directadmin.conf. Key directives:
# Number of failed logins before blacklisting
brutecount=5

# Time window (seconds) in which failures are counted
brute_force_time=1800

# How long (seconds) a blacklisted IP stays blocked
brute_force_period=86400brute_force_log_email=admin@yourdomain.comDirectAdmin will send an email each time an IP is added to the blacklist, giving you real-time visibility into attack attempts.
# View current blacklisted IPs
cat /usr/local/directadmin/data/admin/ip_blacklist

# Remove a specific IP from the blacklist (e.g., if you locked yourself out)
grep -v "1.2.3.4" /usr/local/directadmin/data/admin/ip_blacklist > /tmp/bl_tmp && mv /tmp/bl_tmp /usr/local/directadmin/data/admin/ip_blacklist
service directadmin restartecho "YOUR.ADMIN.IP.HERE" >> /usr/local/directadmin/data/admin/ip_whitelist
service directadmin restartIn directadmin.conf, ensure SSL is enforced:
SSL=1
carryover_login=1
Then install a valid SSL certificate via Admin Panel → SSL Certificates. Using Let's Encrypt for the server's hostname is the easiest approach.
Edit CSF's allow rules to whitelist only your admin IP(s). In /etc/csf/csf.allow:
# Allow DirectAdmin port only from admin IP
tcp|in|d=2222|s=YOUR.ADMIN.IP.HERE
Then in /etc/csf/csf.conf, remove 2222 from the open TCP_IN ports list:
# Before: TCP_IN = "20,21,22,25,53,80,110,143,443,465,587,993,995,2222"
# After:  TCP_IN = "20,21,22,25,53,80,110,143,443,465,587,993,995"
csf -rIf you cannot whitelist by IP (e.g., you have dynamic IPs), consider moving the panel to a non-default high port. In directadmin.conf:
port=52222Restart DirectAdmin and update CSF TCP_IN accordingly. This will not stop determined attackers who scan all ports, but it eliminates casual automated hits on 2222.
cd /usr/src
wget https://download.configserver.com/csf.tgz
tar -xzf csf.tgz
cd csf
sh install.shcp -r /usr/local/csf/csfda /usr/local/directadmin/plugins/In DirectAdmin admin panel: Extra Features → Plugin Manager. The CSF plugin will appear, giving you firewall management directly inside DirectAdmin.
The directadmin-bfm-csf integration script from Poralix routes DirectAdmin BFM block events into CSF, so brute-forced IPs are blocked at the firewall level (not just the panel level). Install it:
cd /usr/local/directadmin/scripts
wget https://raw.githubusercontent.com/poralix/directadmin-bfm-csf/master/bfm_block_ip.sh
chmod 700 bfm_block_ip.sh
Then in directadmin.conf:
brute_force_script=/usr/local/directadmin/scripts/bfm_block_ip.shNow every failed-2FA-triggered blacklist event also drops the IP in CSF — the firewall blocks all further traffic from that IP, not just DirectAdmin login attempts.
In /etc/csf/csf.conf:
LF_DIRECTADMIN = "5"
LF_DIRECTADMIN_PERM = "3600"
This tells LFD to block after 5 DirectAdmin login failures within the trigger window, and keep the block for 1 hour.
# On CentOS/AlmaLinux/Rocky
yum install mod_security mod_security_crs -y

# On Debian/Ubuntu
apt-get install libapache2-mod-security2 -yAfter installation, activate the CRS configuration:
cp /etc/modsecurity/crs/crs-setup.conf.example /etc/modsecurity/crs/crs-setup.conf
# Enable detection mode first, then switch to prevention:
# SecRuleEngine DetectionOnly → SecRuleEngine On
Check the Apache error log for false positives after switching to On:
tail -f /var/log/httpd/error_log | grep ModSecurityWhitelist any legitimate requests that trigger false positives using SecRuleRemoveById in a custom config file before going to full blocking mode.
In DirectAdmin admin panel: Server Manager → ModSecurity. You can enable ModSecurity per-domain, server-wide, and manage rule sets via the UI. DirectAdmin integrates with the OWASP CRS and lets you update rule sets without touching the command line.
# CentOS/AlmaLinux
yum install fail2ban -y

# Debian/Ubuntu
apt-get install fail2ban -y
Create a DirectAdmin jail in /etc/fail2ban/jail.local:
[directadmin]
enabled  = true
port     = 2222
filter   = directadmin
logpath  = /var/log/directadmin/errortaskq.log
maxretry = 5
bantime  = 86400
findtime = 3600
Create the filter in /etc/fail2ban/filter.d/directadmin.conf:
[Definition]
failregex = .* \[notice\] .* Failed login attempt.* from
ignoreregex =
systemctl enable fail2ban
systemctl restart fail2ban
fail2ban-client status directadmin# DirectAdmin running with 2FA enforced
service directadmin status
# CSF firewall active
csf -l | head -20
# Fail2Ban monitoring DirectAdmin logs
fail2ban-client status directadmin
# ModSecurity loaded in Apache
httpd -M | grep securityFAQs
Summary
Locking down a DirectAdmin server requires more than enabling 2FA for the admin account alone. The complete security stack covered here — enforcing 2FA at all tiers via directadmin.conf, routing BFM blocks through CSF so failed 2FA attempts trigger firewall-level bans, restricting port 2222 by IP, and adding ModSecurity OWASP rules plus Fail2Ban — creates a defence-in-depth posture where each layer catches what the previous one misses. If you would rather have a specialist implement and monitor this stack for you, CloudHouse server management handles DirectAdmin hardening as part of fully managed server plans — including 24/7 monitoring, proactive patching, and incident response.