Losing emails due to mistyped addresses, retired accounts, or domain migrations is one of the most frustrating problems hosting clients face — and the fix almost always starts with a proper cPanel email forwarder setup. Whether you need to redirect a single address, catch everything sent to an entire domain, or ensure mail routes correctly through WHM, this guide covers every configuration step with the detail most tutorials skip.
By the end you will know how to set up account forwarders, domain forwarders, and catch-all addresses in cPanel, how to align WHM Email Routing so those forwarders actually work, and how to avoid the spam and deliverability traps that catch administrators off guard. If you would rather hand this off entirely, a managed server management service can handle the full configuration for you.
Understanding cPanel Email Forwarding: Account vs Domain vs Catch-All
Before touching any settings it is worth understanding what each forwarding type does and when to use it, because choosing the wrong one is the root cause of most missing-mail complaints.
Account Forwarders
An account forwarder redirects all mail sent to one specific email address to one or more other addresses. For example, you might forward sales@yourdomain.com to a team inbox or to a personal Gmail. The original address does not need to exist as a real mailbox — cPanel will accept the mail and relay it. This is the most common forwarder type and is configured entirely from within the cPanel interface.
Domain Forwarders
A domain forwarder redirects all mail addressed to an entire domain to another domain. If a client acquires a new domain and wants to retire the old one without bouncing any mail, a domain forwarder on olddomain.com pointing to newdomain.com means that anything sent to @olddomain.com is automatically readdressed and delivered to the matching account at @newdomain.com.
Catch-All (Default Address)
A catch-all, called the Default Address in cPanel, is a safety net. Any mail sent to a username that does not exist as a real mailbox or account forwarder on the domain lands in the catch-all destination. Without a catch-all configured, cPanel's default behaviour is to bounce the message with a failure notice — which is what clients experience as "email disappeared". Configuring the catch-all to deliver to a monitored inbox prevents that bounce entirely.
💡 None of these worked? Skip the guesswork.
Get Expert Help →How to Set Up an Email Account Forwarder in cPanel
Account forwarders are the most straightforward to configure. Follow these steps exactly to avoid partial setups that silently drop mail.
Navigate to your cPanel login URL, typically https://yourdomain.com:2083, and sign in with your account credentials.
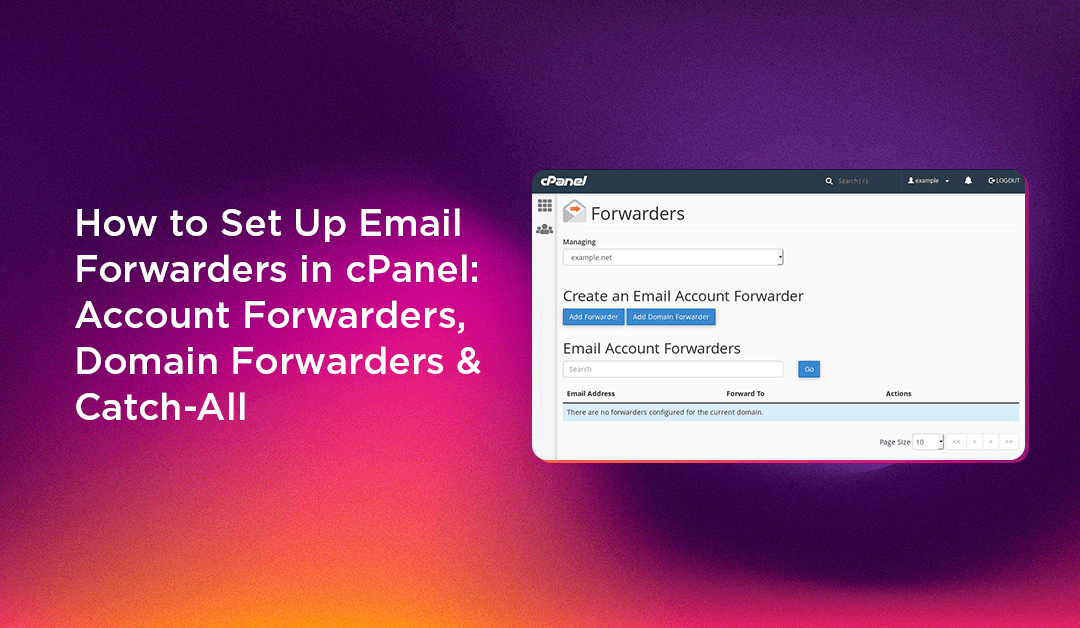
In the Email section of the cPanel home page, click Forwarders. This opens the Forwarders management screen, which shows two tabs: Email Account Forwarders and Domain Forwarders.
Under the Email Account Forwarders tab, click the Add Forwarder button.
In the Address to Forward field, type the username portion of the email (e.g. info). If you manage multiple domains on this cPanel account, select the correct domain from the dropdown beside it.
cPanel gives you three destination options:
- Forward to Email Address — type the destination address (can be on the same domain, a different domain, or an external provider like Gmail).
- Discard and send an error to the sender (at SMTP time) — useful if you want to retire an address gracefully with a bounce message.
- Pipe to a Program — routes mail to a script; used for advanced autoresponders or ticketing integrations.
The forwarder is active immediately. Send a test message from an external account to confirm delivery. Check the destination inbox and also verify via Track Delivery (also in the Email section) if the test message does not arrive within two minutes.
Forwarding to Multiple Addresses
To forward a single address to several recipients, simply add multiple forwarders pointing from the same source address to different destinations. cPanel will deliver a copy to each destination independently. There is no built-in "add multiple destinations" field in one step — you create one forwarder per destination address.
From the cPanel Forwarders screen, click the Domain Forwarders tab at the top of the page.
Click the Add Domain Forwarder button.
From the dropdown, select the domain you want to forward mail away from (e.g. olddomain.com).
Type the destination domain name (e.g. newdomain.com). Do not include @ or a username — just the bare domain.
The rule is active immediately. Any mail sent to anything@olddomain.com will now be rewritten and delivered to anything@newdomain.com.
Important Pre-Conditions for Domain Forwarders
- The source domain's MX records must still point to your server. If DNS has been migrated away, cPanel never sees the inbound mail and cannot forward it.
- The destination domain must accept mail. If
newdomain.comhas no mailboxes configured or its MX records point nowhere, the forwarded mail will bounce. - The WHM Email Routing setting for the source domain must be set to Local Mail Exchanger.
In the Email section of cPanel, click Default Address.
If the account hosts multiple domains, use the dropdown to pick the domain you want to configure a catch-all for.
- Discard the email silently — mail to unknown addresses disappears with no bounce.
- Send an error message to the sender — a controlled bounce with a custom message.
- Forward to email address — all unrouted mail lands in a real mailbox. This is the recommended option for most businesses.
- Pipe to a program — for custom processing scripts.
Type the full email address where catch-all mail should go. This inbox will receive everything sent to non-existent usernames on the domain, so make sure someone monitors it.
The setting takes effect immediately for all new incoming mail.
Configuring Email Routing in WHM: Local, Remote, and Backup MX
This is the step most tutorials skip, and it is the reason forwarders and catch-all settings sometimes appear to be configured correctly but still fail. WHM Email Routing tells Exim how to handle mail for each domain — and a wrong setting here overrides everything you set up in cPanel.
To access Email Routing, log in to WHM (https://yourdomain.com:2087), then navigate to Home > DNS Functions > Email Routing.
Local Mail Exchanger
Choose this when your server is the final destination for the domain's mail. This is correct for any domain whose MX records point to this server. With this setting, Exim accepts the mail locally and applies your cPanel forwarder and catch-all rules. If forwarders are not working, verify this is selected — if the domain is set to Remote when MX points locally, Exim tries to relay the mail out and may reject or loop it.
Remote Mail Exchanger
Choose this when the domain's mail is handled by an external provider (e.g. Google Workspace or Microsoft 365) and the server should not accept or process inbound mail for that domain. With this setting, cPanel forwarders and catch-all addresses are bypassed entirely. This is a very common misconfiguration: the server is set to Remote when clients complain that cPanel forwarders are not firing.
Backup Mail Exchanger
Choose this when the server acts as a secondary MX — it queues mail if the primary MX is unreachable and delivers it when the primary comes back online.
For any server you manage through a managed server management service, ensuring Email Routing is set correctly per domain is part of a proper onboarding checklist — it is the difference between a working mail infrastructure and a support ticket every other week.
Avoiding Spam Loops and Deliverability Pitfalls with Email Forwarders
Forwarding Loops
A forwarding loop occurs when address A forwards to address B and address B forwards back to address A. Exim catches most loops via a hop count limit and returns a "too many hops" bounce. Prevention: before adding any forwarder, check the destination address to confirm it does not already forward back to the source. Use cPanel's Track Delivery tool to trace the path of a test message step by step.
Forwarding to Gmail, Outlook, or Yahoo
This is the highest-risk configuration and the most common cause of server IP blacklisting. When your server forwards mail that originally came from a third-party sender, the forwarded message often fails the recipient's SPF check because your server's IP is not listed in the original sender's SPF record. Gmail and Outlook may silently drop the message, report your server IP to spam blocklists, or block your server entirely.
The correct mitigation is to implement SRS (Sender Rewriting Scheme) on your Exim installation. SRS rewrites the envelope sender address so that bounces return to your server rather than the original sender. On cPanel/WHM servers, SRS support can be enabled via WHM under Service Configuration > Exim Configuration Manager > Advanced Editor.
Catch-All Spam Volume
Enabling a catch-all on a domain that has been publicly listed will result in a significant increase in incoming spam from dictionary attacks. Mitigate this by enabling SpamAssassin in cPanel for the catch-all destination mailbox and setting an aggressive spam score threshold (5.0 or lower).
DKIM Alignment After Forwarding
DKIM signatures survive forwarding intact as long as the message body is not altered. However, some spam filters and mailing list managers add footers or modify headers, which breaks the DKIM signature. If forwarded mail is failing DKIM at the destination, trace with mail headers to identify where the modification occurs.
Getting email forwarding right in cPanel requires understanding how account forwarders, domain forwarders, catch-all addresses, and WHM Email Routing interact with each other. Configure each layer carefully, test with real messages, and monitor your mail queue after any change. If you would rather have an experienced team manage your server's full email infrastructure, CloudHouse's managed server management service covers cPanel and WHM configuration end to end, so your clients never lose another email.